How To Propagate Lemon Lime Maranta In Leca
Introduction
Welcome to our guide to how to propagate lemon lime maranta in leca, covering all you need to know and what you’ll need.
See also: our main Maranta Lemon Lime care guide and our other lemon and lime maranta propagation guides: In Water, In Sphagnum Moss.
Why Use Leca?
Leca is a great medium as you can tell if the plant needs water by just looking at the cup, and as long as you keep a small level of water at the bottom, the roots will be able to take what they need so the plant does not get over or underwatered. You get much less root rot that you do with soil, and you get more air to the roots which helps the propagations.
How Leca Works
Leca works by wicking up water when it needs it, so if you have a cup of leca and keep a small amount water in he bottom of the cup all the clay balls will remain moist as moisture travels slowly up from ball to ball through the clay. This means the roots get moisture without being over or under watered (as long as you keep a little bit of water in the bottom).
How To Propagate Lemon Lime Maranta In Leca
First of all I would recommend water propagating the cuttings first (like we covered in this guide: How To Propagate Lemon Lime Maranta In Water) as you’ll have already rooting cuttings when you add them to the leca. Follow these steps:
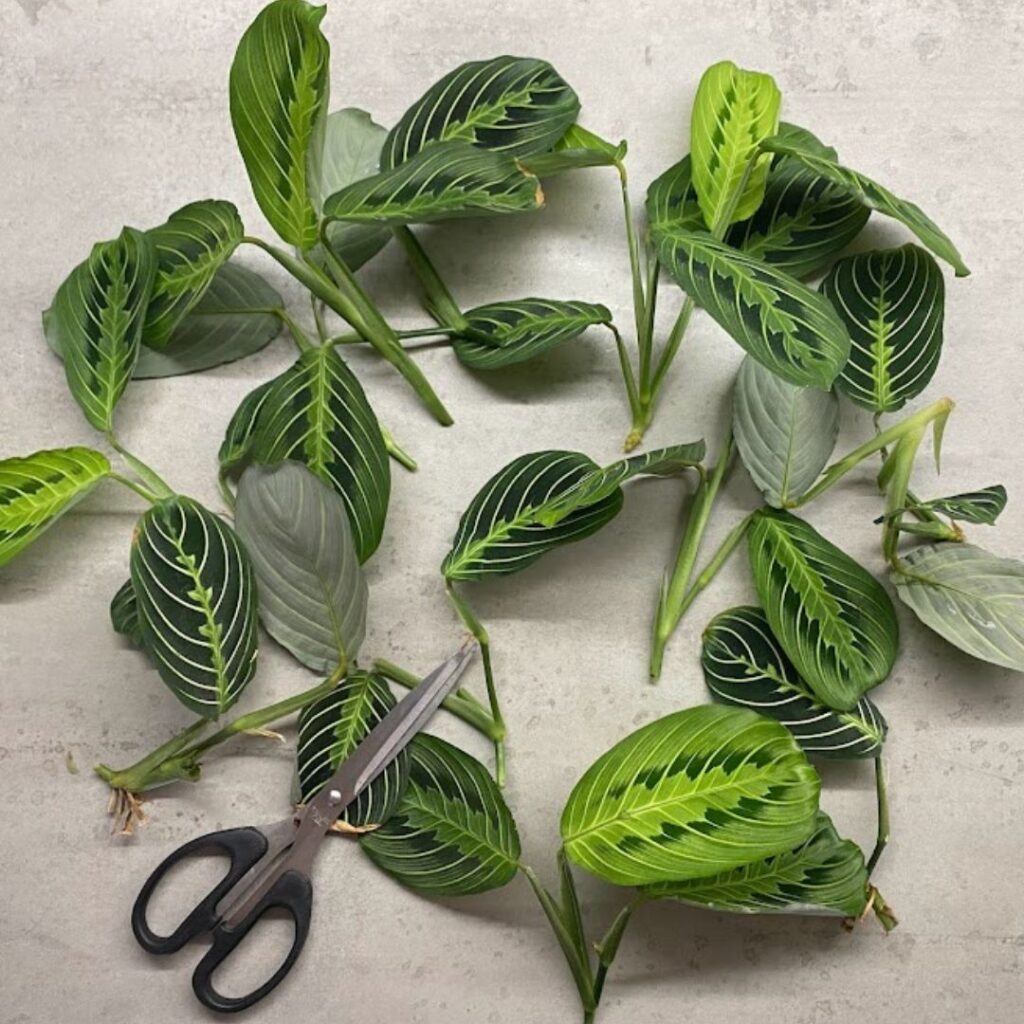
- Take Your Cutting
- Put The Cutting Aside
- Put The Cutting In Water
- Put It In Indirect Sun and Keep It Warm
- Keep The Water Topped Up
- Wait A Month Or Two For The Cuttings To Root
(I get a much better success rate if I use the 6 steps above to water propagate the plant first. But if you want you can skip the water prop part and just take a cutting, let it callous over and then put it straight into leca then follow the steps below…)
Step 7: Wash The Leca
Once the cuttings have some roots you can put them in leca. You want to wash the leca first, ideally a few hours before, by soaking it then draining the water off, then re-soaking and re-draining a few times to get rid of all the clay dust. Then put it in a bowl of water to soak for a few hours. I use filtered tap water as the plants seem to do better in it and you can get less white residue build up on the clay pebbles, especially if you live in a ‘hard water’ area.
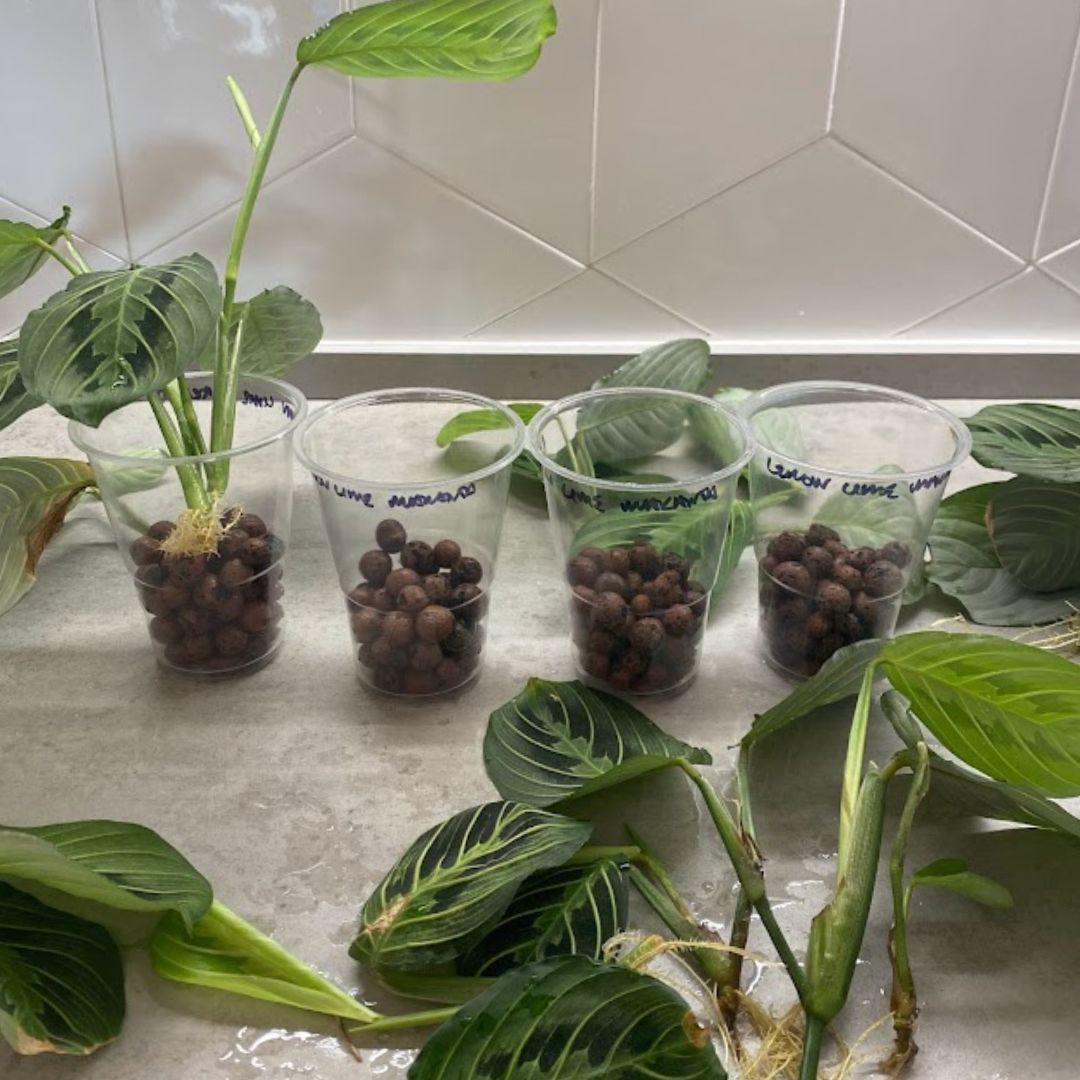
Step 8: Part Fill A Cup With Clay Pebbles
Get a cup or jar. Transparent jars or cups are much better so you can see the water levels and root growth. Fill the cup about a third of the way up with the pre-soaked leca. You want plenty of space under the cutting so you can keep a layer of water in the bottom of the cup, the cutting should not be touching the water.

Step 9: Plant The Cutting In The Leca
Put the cutting in the leca, then keep it upright and in the center of the cup with your hand. Then fill in the sides in with leca so the cutting is held in. You can use a second cup filled with leca and pour it in around the sides of the cutting.
Be careful at this stage as the cutting can easily come out of the pot if pulled. Once rooted it will be held in place so you want to be careful you don’t pull it out for the first month until the roots are established.
Step 10: Add Water To The Cup
Fill the cups with water. You normally want about 2cms or half an inch of watering the bottom of the cup and the cutting will use what it wants. But the first time I water the cutting I fill the cup up all the way, this way the cutting will water propagate a bit and gradually adjust to the leca as the water is used up. Then after that I maintain the 2cms / half inch reservoir at the bottom of the cup.
Step 11: Keep A Small Reservoir Of Water In The Bottom Of The Leca
Check the cuttings each week and keep the reservoir of water topped up so the bottom of the cutting is not touching the water. This way the cutting always has the water it needs but is never over watered or sat in water.
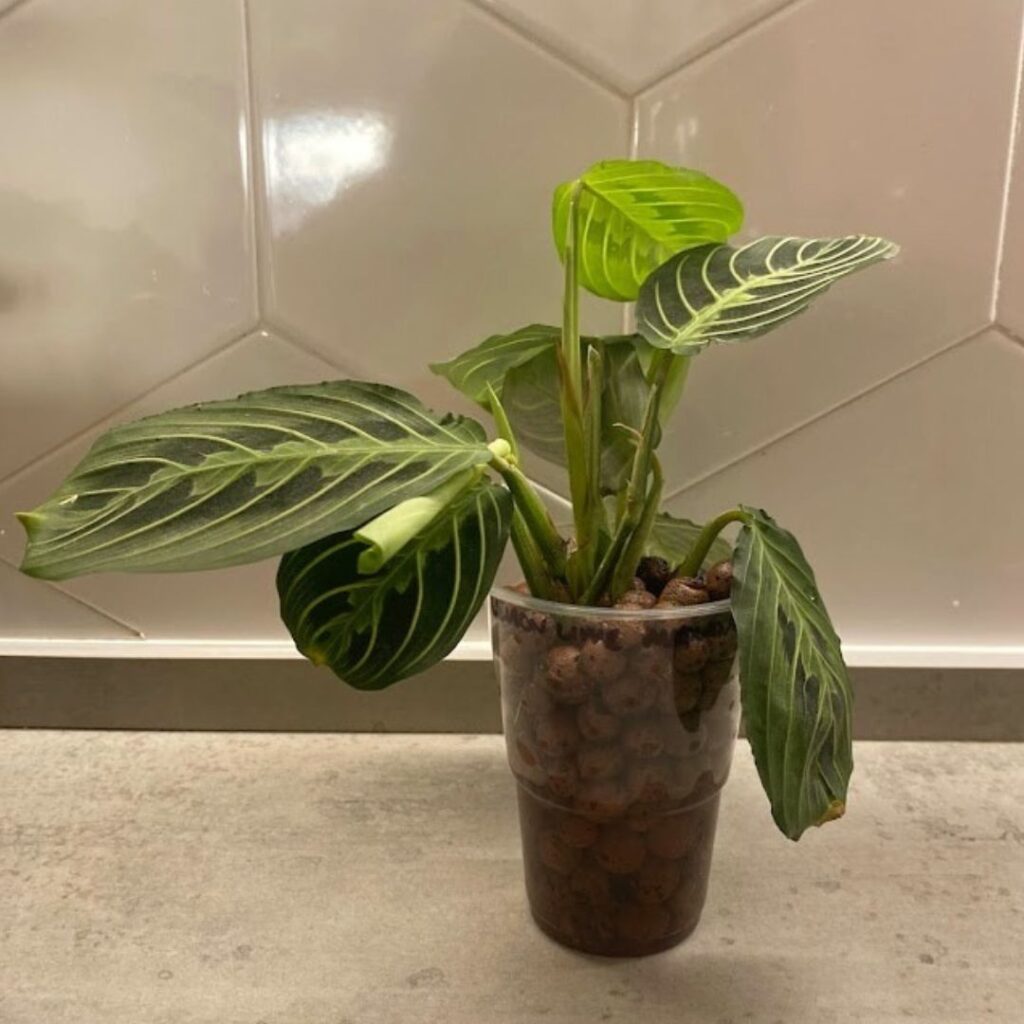
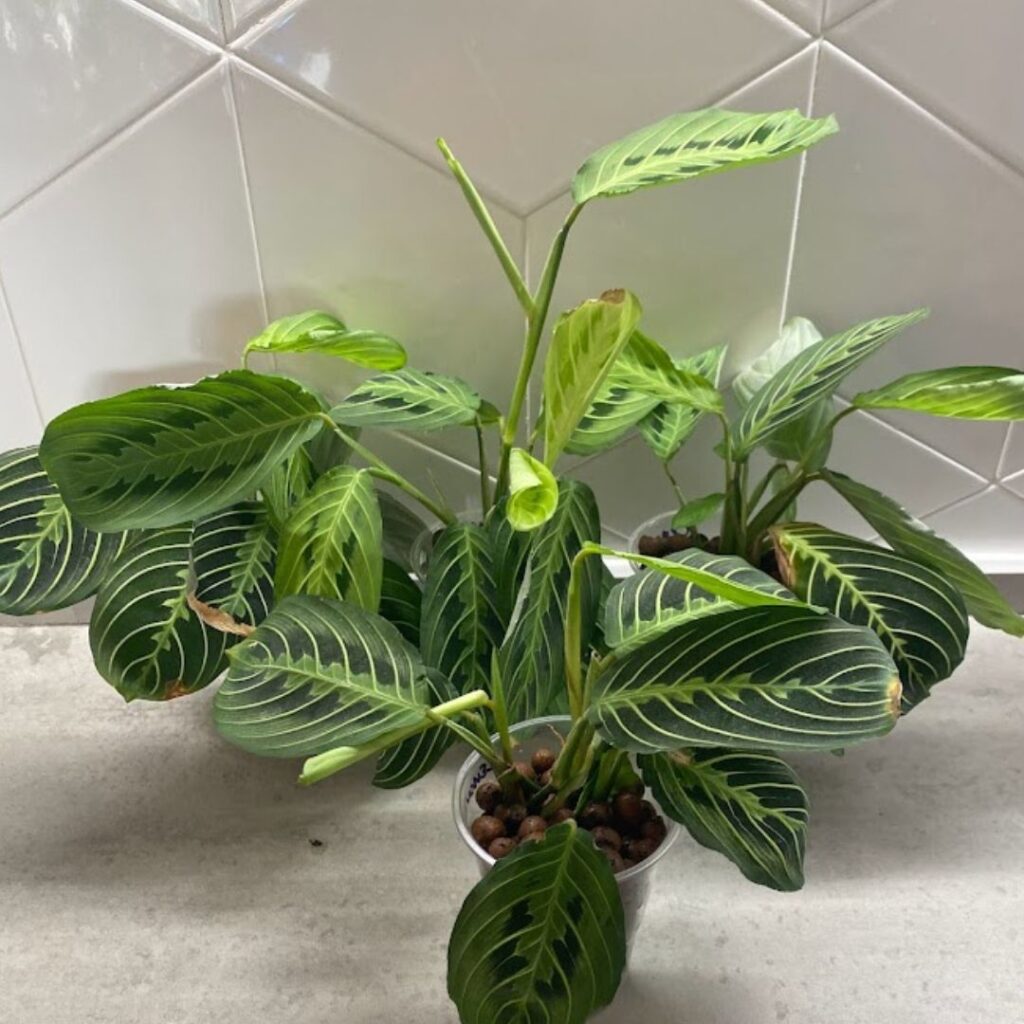
Step 12: Keep The Plant Growing in Leca Ongoing
Over the next few weeks and months the cuttings should take to the leca well and the roots should grow and grab on to the clay balls. Keep the water topped up at the bottom. The plant should be in indirect sunlight to encourage growth.
You can use a fertilizer which can help the plant to grow much faster. Make sure it is either meant for leca/semi-hydroponics, or use a normal balanced plant feed but dilute by much more that is required for soil, I use 3 times as much water.
They can stay in leca ongoing, or you can move them to soil if you like.
You can find all our articles on leca propagation here, like the Philodendron Burle Marx Propagation In Leca article.
Conclusion
Hope you found this guide useful, you might also like our other guides:
Our main Maranta Lemon Lime care guide and our other lemon and lime maranta propagation guides: In Water, In Sphagnum Moss.